
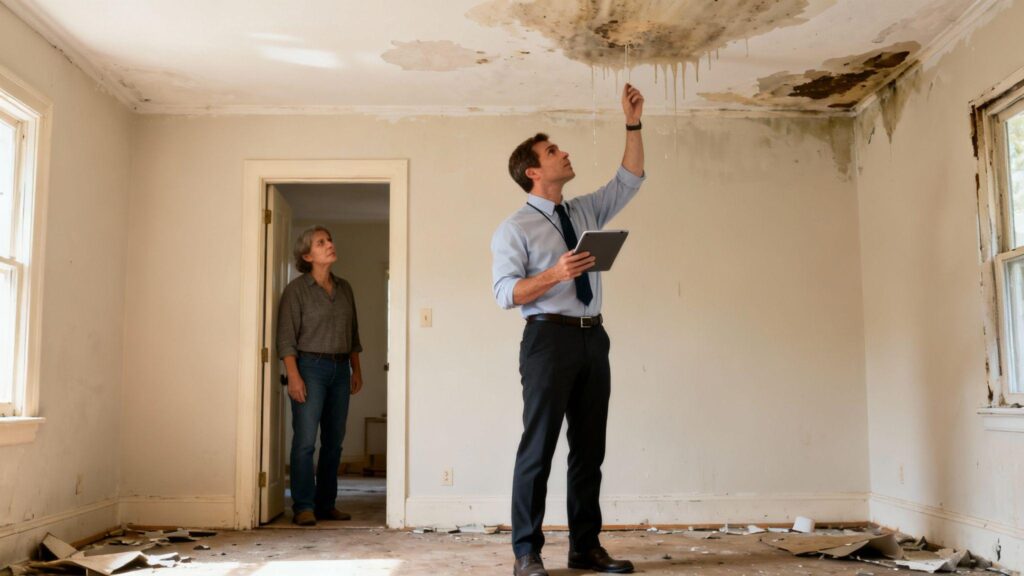
When a tenant reports water coming into a rental property, the landlord’s response in the first few hours can make a significant difference in limiting damage. A water leak can quickly turn into a costly restoration project when it is not addressed promptly. For landlords and property managers, the first priorities are to protect people, stop the source of the water when it is safe to do so, and arrange an appropriate response before the damage spreads. Water damage in a rental moves on a different clock than in an owner-occupied home: the tenant discovers it, the landlord authorizes the response, and the property manager sits in the middle of both. This checklist is the sequence restoration professionals wish every landlord and manager had on file before the phone rings.
Step 1: Triage the first call (minutes, not hours)
The tenant’s first report is the most valuable diagnostic you will get, and the questions you ask now shape everything after. Ask: Where exactly is the water, and is it still coming in? (Active flow changes the priority.) Is it clean supply water, rain intrusion, or backing up from a drain? (The source category drives safety and cleanup decisions.) Is any water near outlets, switches, or the breaker panel? How long has it been happening, as far as they can tell? Can they take timestamped photos and a short video right now, before touching anything?
Ask them not to start ripping things out. Well-meaning tenants sometimes tear out wet drywall or carpet, which can interfere with documentation and expose them to hazards. Tell them to move valuables off wet floors if it is safe to do so, stay out of rooms with standing water near electrical equipment, and wait for your instruction.
Safety comes first: Do not enter standing water or touch wet electrical equipment if there may be an electrical hazard. If the power supply needs to be shut off, do so only from a safe, dry location. If the area is unsafe or you are unsure whether electrical systems have been affected, keep people away and contact a qualified professional before proceeding.
Step 2: Stop the source and protect the unit
The first response goal is containment. If the water is plumbing-related, the tenant may be able to turn off a fixture shut-off or the main valve if you have already told them where it is. This is why a labelled shut-off location in the move-in packet pays for itself. If they cannot do it safely, your first call should be to someone who can, before anything else.
Safety comes before salvage. If water is near electrical equipment, keep people out of the affected area and have a qualified professional assess the hazard before anyone enters or attempts to shut off power. If there is any sign of sewage or drain backup, treat the water as potentially contaminated. Do not ask tenants to clean it up themselves; appropriate protective equipment, containment and professional remediation may be necessary.
Document before you disturb. Timestamped photos and video of standing water, damaged finishes and the source point help document the incident and support any insurance claim or later assessment of responsibility. Note the date and time. If the tenant has already started cleaning, photograph what remains and record what was moved or discarded. Any decision about tenant liability or security-deposit deductions should be based on the evidence, the lease and applicable local law.
Step 3: Decide what the response looks like
Not every leak needs a restoration crew, but the decision should be based on the extent and category of the damage, not on hope. As a working rule, a small, clean-water event, such as a supply-line drip caught the same day and contained to one area, may be manageable with appropriate water extraction, airflow and dehumidification if the affected materials can be safely dried and there are no signs of hidden damage or contamination. Moisture readings can help verify the drying process before materials are closed back up.
Standing water across multiple rooms, water that has been sitting for an extended period, water that has wicked up drywall or beneath flooring, or any suspected contamination are reasons to consider a professional restoration firm. Porous materials can begin supporting mould growth quickly in warm, humid conditions. The U.S. Environmental Protection Agency notes that mould can begin growing on wet materials within 24 to 48 hours under suitable conditions, although the exact timeline varies. Prompt drying and appropriate moisture assessment are therefore important.
The question landlords get wrong most often is, “Can we just dry it in place?” The answer depends on what got wet and how extensively it was affected. Hard surfaces such as tile and concrete may often be cleaned and dried in place, provided moisture has not become trapped beneath them. Sealed wood and other materials should also be assessed for moisture damage. Porous materials such as drywall, insulation and carpet padding may need removal when they are heavily saturated, contaminated or cannot be adequately dried and cleaned.
A professional moisture meter reading, together with an assessment of the affected materials and the water source, is more reliable than a fingertip test. Hidden moisture behind walls or beneath flooring can remain even when the surface feels dry.
Step 4: The 48-hour drying and monitoring window
The first 24 to 48 hours are an important window for reducing the risk of mould growth after water damage. Where possible, begin drying affected materials promptly. The appropriate approach depends on the water source, the materials involved, the extent of the damage and the conditions within the property.
Whether you handle the work or a contractor does, the sequence is generally as follows:
- Extract and remove standing water first. Pumps and wet vacuums may be suitable for bulk water when the water is known to be safe to handle. Prompt removal helps limit further damage. Do not use equipment or enter an affected area if electrical hazards or contamination have not been assessed.
- Arrange appropriate airflow and dehumidification. For clean-water incidents, air movers and a suitably sized dehumidifier may help dry the space. Opening the space up, removing baseboards or lifting carpet may sometimes be necessary when moisture has entered building materials. These steps should be guided by the extent of the damage and the materials involved. Avoid using fans to circulate potentially contaminated air before the water source and hazards have been assessed.
- Monitor with readings, not assumptions. Drying is not complete just because the surface feels dry. Moisture readings should be taken as appropriate and compared with an unaffected area of the same material where possible. Closing walls or relaying flooring before materials are adequately dry can allow hidden moisture problems to persist.
- Clean and sanitize where appropriate. Clean and dry affected hard surfaces using methods appropriate for the material and the type of water involved. Follow product-label instructions when using cleaning or antimicrobial products. Sewage, contaminated floodwater and water containing hazardous substances may require professional assessment, containment and remediation rather than routine household cleaning.
Keep a simple log: dates, work completed, moisture readings and photos. If the claim is ever disputed, this record can help establish what happened and what steps were taken.
Wet materials should be assessed promptly to determine whether they can be safely dried and restored or need to be removed. Porous materials such as insulation, ceiling tiles and carpet padding may require removal when they are heavily saturated or contaminated. Hard surfaces may be salvageable if they can be properly cleaned and dried. Hidden moisture behind walls, beneath flooring or inside building materials should also be assessed, as visible surface dryness does not necessarily mean the affected area is dry throughout.
Step 5: Documentation that protects the asset
Water damage in a rental touches three records at once: the insurance claim, the security deposit and the property’s repair history. Protect all three:
- Keep every timestamped photo, the moisture log, all invoices and receipts, and all correspondence with the tenant and contractors in one file.
- If the damage affects habitability, check your lease and local requirements. Obligations to tenants during repairs, displacement arrangements and rent credits vary by jurisdiction, so seek appropriate advice where necessary.
- When the work is done, keep the after-repair documentation too: readings showing that affected materials have dried adequately, along with photos of the completed repairs. The next time this unit is sold, leased or insured, that file can help demonstrate how the problem was handled.
- Review the move-in packet afterward. Add the main shut-off location, an instruction to report water problems immediately, and guidance against unauthorized demolition or removal of damaged materials.
Documentation alone does not establish that a tenant is responsible for the damage or that a security-deposit deduction is lawful. Responsibility depends on the cause of the damage, the lease terms and applicable local law. Landlords should check the relevant legal and insurance requirements before making decisions about liability or deductions.
The landlord habit that costs nothing
Schedule one water check a year per unit: under-sink cabinets, the water-heater pan, washing-machine hoses, AC condensate lines, and the caulking and seals around windows and exterior openings. These checks take little time and can help identify small leaks before they develop into larger maintenance or restoration problems.
This checklist provides general property-management guidance and is not a substitute for professional restoration, electrical, legal or insurance advice. Requirements and procedures may vary depending on the property, the source of the water and local regulations.
About Author
James Carter is part of the team at Water Damage Connect, a 24/7 emergency water damage restoration network headquartered in Miami, FL. The team responds to flooding, burst pipes and storm damage across 1,000+ U.S. cities with water extraction, structural drying and direct insurance billing. More homeowner resources: waterdamageconnect.com
Lets highlight your brand?
Publish your article on Publcity to showcase your business, expertise, services or ideas.
Explore Sponsored Publishing Options → Publish your article or choose our done-for-you option.Submit Free Guest Posts
Have an original story, useful insight or professional perspective to share? Publcity welcomes contributions across Business, Marketing, Technology, Travel and Culture.
Review the submission guidelines before sending your article.